Showing posts with label photography. Show all posts

Saturday, September 25, 2010

Food Photo Shoot: European Desserts

Hope you are having a great weekend!  I have been baking and taking pictures of desserts to help me illustrate Tiramisu, Caramel Panna Cotta and Profiteroles.  Here are some shots from my work today:
Tiramisu with whipped peaks lightly dusted with cocoa powder
 Caramel Panna Cotta or Creme Caramel
A cool shot of the Caramel Panna Cotta on my porch
Oreo Tiramisu!
This last shot is Tiramisu for two - made especially for my husband and I to enjoy tomorrow on our 1 year wedding anniversary!!

Wednesday, September 8, 2010

On My Way To The Great North West

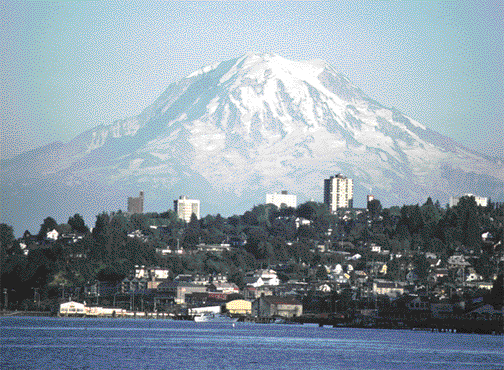
Tomorrow my husband and I leave for his home town of Tacoma, Washington.  It's a cute town and on a clear day you can see Mt. Rainier in the distance.
Hopefully I'll get a chance to take some photos, like I did the very first time I went to Tacoma/Seattle with Brad, when we were newly dating...
Despite it being a tourist trap, I LOVE Pike's Place Market in Seattle!  
On Friday we're going to the Puyallup Fair.  And everyone tells me I gotta try the scones.   I hope it's sunny so I can take a picture that will look like this:
                             
Puyallup Fair - Puyallup, WA - 9-25-05 - jimvid's Photos

And maybe I'll even go on the Roller Coaster, (before eating the scones).  So pray for sun so I can snap lots of photos and return with beautiful pictures to post.  

Thursday, September 2, 2010

A Surprise Painting For My Dad

This is a painting of my Dad rowing on the St. Lawrence river in northern New York.  While I can take credit for painting it, I can't take credit for the thoughtfulness of Tom Taylor, our family friend who commissioned me to paint it as a gift to my Dad.  Check out Tom's new photo blog.  Hopefully he'll send me more photos to paint - it looks like he has an eye for capturing beautiful scenery.  

Monday, August 30, 2010

Photographer Annie Liebovitz

This Saturday night my husband and I watched the documentary, Annie Leibovitz - Life Through A Lens. It was an enjoyable look at a famous magazine photographer who's had a lot of unique experiences.  I didn't know much about her until I saw this doc and I was amazed by where her work has taken her from traveling with The Rolling Stones to photographing John Lennon just hours before his death.  Definitely a great doc to watch - you won't be bored.

Here are some of Annie Liebovitz's famous photos:  
1.  John & Yoko, 2.  Whoopi Goldberg, 3.  Nicole Kidman


Friday, August 6, 2010

Evolution Of A Food Painting

Step One:  Photography
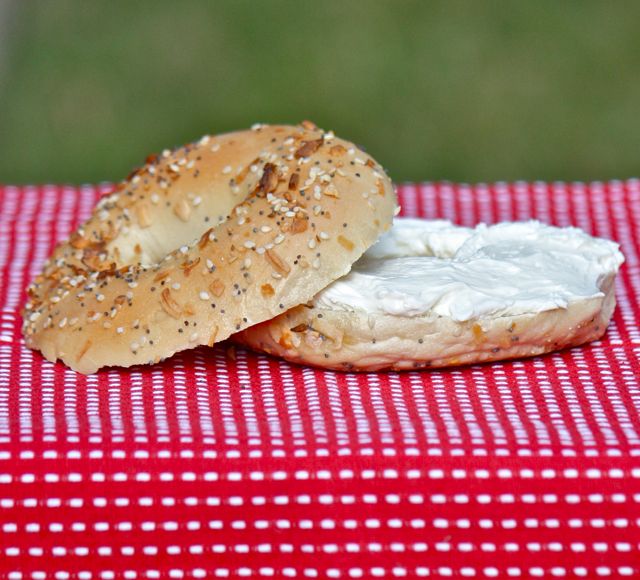
When I get a commission to paint something for someone's kitchen I first have to come up with a good photograph to work with.  Although I could paint from a still life, I wouldn't want to leave food out for days and have the composition change or stink up my house.  Today I am working on a painting of a bagel with cream cheese and these are some of my photos:


Monday, July 12, 2010

Scenic Inspiration: The Anza Borrego Dessert

Brad and I took a road trip to Borrego Springs, CA this weekend.  The tiny town of Borrego Springs is located in The Anza Borrego Dessert which is part of San Diego County.  Our adventure was inspired by the need for sunshine and hot, summer weather, which we've been lacking on the San Diego coast as of late.  This trip was very quiet and relaxing since the summer is when Borrego Springs is virtually a ghost town due to the temperatures in the 100s.  We loved it.  Here are some pictures from stops on our drive.


Friday, April 2, 2010

DIY: Photo Light Box

So I was reading online that you can make your own photo light box at home without spending a ton of money.  I went to Walmart this week and picked up a few items to make a budget photo light box for still life photography.  I intend to shoot things in the photo box and then paint them if I like the results. Here is what I used to make the photo box:

1.  Large box from Walmart
2.  1 yard of black fabric from Walmart
3.  An x-acto knife
4.  A piece of black poster board from Walmart
5. A desk lamp
6.  A small folding table
7.  A wood box of some to use as a pedestal for your subject matter

All you have to do is cut a hole in the side of the box, put some black paper inside the box (or another color if you'd like) and set up a pedestal inside the box with your subject matter.  (no picture of this step - sorry!)  Then position the desk lamp so it shines through the hole.  I also experimented by holding the light source in different positions.  If you have questions about this set up, please let me know!    


Tuesday, March 30, 2010

French Fry Photo Shoot

Today I held a photo shoot in my office for some tall and skinny models - French Fries!  I am working on some paintings for an old high school friend, Kristy.  Recently, Kristy and her husband opened up a burger joint in Carbondale, CO called Fatbelly Burgers.  According to Colorado burger lovers, their place is awesome!  I can't wait to send Kristy the paintings of burgers and fries - I wish I could deliver them personally and try their burgers.  Maybe next ski season.

Here are some of the photos I took today.  Of course when I paint the pics for Kristy, it won't say Tommy's on it.

Which do you like best?

Sunday, March 14, 2010

How To: Create a Photo Mosaic

I have been admiring the photo collages and mosaics posted around the blogosphere so I decided to ask google how to make one.  I found a simple way to make a photo mosaic on http://bighugelabs.com/.   I am sure there are more advanced techniques, especially if you have Photoshop, but seeing that I am a rookie, this worked fine!

Here are the steps to take to get a mosaic like the one below:

1.  Upload a group of photos to Flickr as a set.  It can be as few as 2 or as many as 36.
2.  Go to www.bighugelabs.com and click on the Mosaic Maker on the home page.
3.  Follow the steps in the Mosaic Maker.  You can upload from flickr by the set, or by individual photos.  I think uploading a set is the quickest way to go.  You may have to crop some of the photos and play around until you get it right for the size of the mosaic tiles.  
4.  Save the new Mosaic Image as a file on your computer.
5.  Upload the image in your blog post and VOILA:

Torrey Pines State Reserve, March 14th 2010